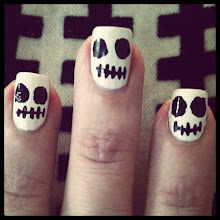
This mani was rather simple. I started with a pink base and used scotch
tape to mask the pin wheels. I've never had much luck with tape and
masking, mainly because I'm too impatient to let the base dry
completely. However, I've got a new strategy- which is letting the base
color dry over night and then finishing the mani the next day. And
guess what? It's working thus far!
Thursday, May 17, 2012
Monday, May 07, 2012
Friday, April 27, 2012
Making a Spectacle: Nailed It!
Essie Sand Tropez polish
Black Sally Hansen Nail Art Pen
New York Color Matte Me Crazy
(Sorry about my chips and cuticles. I took the photo a few days after the manicure.)
Tuesday, April 17, 2012
Tuesday, March 27, 2012
Philly Cherry Blossoms: Nailed It!
Monday, March 12, 2012
Geo Color: Nailed It!
(Source)
Monday, March 05, 2012
Sunday, February 26, 2012
Tribal: Nailed It!
Tuesday, February 07, 2012
Sunday, January 29, 2012
Matryoshka: Nailed It!
My friends keep telling me that I need to take it to the next level. So I'm going to slowly start "upping the anti" in my nail posts. This week I did tiny little matryoshka dolls on my nails. I've actually been wanting to do these for a while, but I first envisioned nails that were just inspired by the dolls. You know- maybe some simple roses or the colors in a simple pattern or something. But I figured, why not try to hand-draw them on each nail. After all, I am an artist, with a BFA in Painting.
Here's how I did them:
1. Paint entire nail red (I used Essie Clam Bake)
2. Paint top half of nails yellow (I used Sally Hansen Xtreme)
3. Using white polish, paint a thick white strip in the middle of the nail, making sure to leave a space at the bottom near the nail bed.
4. Use light or hot pink and a dotting tool (I use an old pen) to make pink flowers and pink cheeks
5. With a dotting tool, make green leaves and accents near the flowers
6. Use a black nail art pen to draw eyes, head, hair, scarf and arms.
I'm happy with the results, although I wish they were a little more "neat".


xox
Here's how I did them:
1. Paint entire nail red (I used Essie Clam Bake)
2. Paint top half of nails yellow (I used Sally Hansen Xtreme)
3. Using white polish, paint a thick white strip in the middle of the nail, making sure to leave a space at the bottom near the nail bed.
4. Use light or hot pink and a dotting tool (I use an old pen) to make pink flowers and pink cheeks
5. With a dotting tool, make green leaves and accents near the flowers
6. Use a black nail art pen to draw eyes, head, hair, scarf and arms.
I'm happy with the results, although I wish they were a little more "neat".
xox
Sunday, January 22, 2012
Monday, January 16, 2012
Worn: That about Hems it Up.
Purple Cheetah: Nailed It!
I haven't done cheetah nails in a while and haven't posted them since the Pink Panther nails a while ago.
It seems like cheetah nails are a little too popular these days. (Probably because they are easy and really do look great.) But I wanted something simple with impact and I really do love them. So this week I've done gold with purple. Gold Orly. Purple Kiss Beautiful Nails. Black pen.
Tuesday, January 10, 2012
Black + White: Nailed It!
These are pretty simple. I don't use tape or anything... just my steady hand and some black and white Sally Hansen Hard as Nails Xtreme Wear.
Here's what I'm wearing them with... feeling very high school grunge wearing a denim oxford and my old oxblood Doc Martens.
I'm also listening to Nirvana. What?
Sunday, January 01, 2012
Subscribe to:
Posts (Atom)
Labels
- art (1)
- body image (1)
- DIY (2)
- fashion (1)
- Health and Diet (4)
- Holidays (5)
- house (1)
- inspiration (4)
- Life in General (3)
- Mind (1)
- Nails (61)
- outfits (9)
- style (1)
- Travel (1)
- Vacation (1)
- vanity (1)